
Displaying plans in your app
Before diving into specific implementations, let's understand the overall flow for integrating plan display and subscription management with Mantle:
- Identify your customer: First, call the Identify API to establish the customer's identity in Mantle
- Get customer data: Retrieve their plan/subscription data using the Customer API
- Display plans: Populate your app's frontend with the available plans and current subscription details
- Handle subscriptions: Use the Subscriptions API when a customer selects a plan
Once you understand this flow, you can choose the implementation approach that best fits your needs:
1. Using Mantle's components library
For the quickest implementation, use Mantle's pre-built plan display components from the Mantle Components Library:
import { PlanCardStack, PlanCardType } from '@heymantle/polaris';
import { useMantle } from '@heymantle/react';

export default function PlansPage() {
  const { customer, plans, subscribe } = useMantle();

  const handleSelectPlan = async ({ plan, discount }) => {
    const subscription = await subscribe({
      planId: plan.id,
      discountId: discount?.id,
      returnUrl: "/app/plans"
    });

    // Redirect to Shopify's confirmation page
    window.open(subscription.confirmationUrl, "_top");
  };

  return (
    <Page title="Select a Plan">
      <Layout>
        <Layout.Section>
          <PlanCardStack
            cardType={PlanCardType.Highlighted}
            customer={customer}
            plans={plans}
            onSelectPlan={handleSelectPlan}
          />
        </Layout.Section>
      </Layout>
    </Page>
  );
}
The PlanCardStack component handles the presentation of plans, highlighting the customer's current plan, and provides a consistent UI for plan selection.
2. Building your own plan UI
If you need more customization, you can build your own plan display using the plan data from Mantle. Below is a basic example of how you could create your own components to surface plan data:
import { useMantle } from '@heymantle/react';

export default function CustomPlansPage() {
  const { customer, plans, subscribe } = useMantle();

  const handleSubscribe = async (planId) => {
    const subscription = await subscribe({
      planId,
      returnUrl: "/app/plans"
    });
    window.open(subscription.confirmationUrl, "_top");
  };

  return (
    <Page title="Select a Plan">
      {plans.length === 0 && (
        <Banner>There are no plans available.</Banner>
      )}

      {plans.length > 0 && (
        <HorizontalGrid columns={{ sm: 1, md: plans.length }} gap="4">
          {plans.map((plan) => (
            <Card key={plan.id}>
              <Card.Section>
                <Text variant="headingMd" as="h2">{plan.name}</Text>
              </Card.Section>

              <Card.Section>
                <Text>${plan.total}/month</Text>

                {/* Display plan features */}
                <List>
                  {plan.featuresOrder.map(featureKey => {
                    const feature = plan.features[featureKey];
                    return (
                      <List.Item key={featureKey}>
                        {feature.name}: {
                          feature.type === 'boolean'
                            ? (feature.value ? 'Yes' : 'No')
                            : feature.value
                        }
                      </List.Item>
                    );
                  })}
                </List>
              </Card.Section>

              <Card.Section>
                <Button
                  primary={customer?.subscription?.plan?.id !== plan.id}
                  disabled={customer?.subscription?.plan?.id === plan.id}
                  onClick={() => handleSubscribe(plan.id)}
                >
                  {customer?.subscription?.plan?.id === plan.id
                    ? 'Current Plan'
                    : 'Select Plan'}
                </Button>
              </Card.Section>
            </Card>
          ))}
        </HorizontalGrid>
      )}
    </Page>
  );
}
This is just an example to illustrate one way you might implement a custom plan interface. You can design and structure your UI however best fits your app's design system and user experience needs.
3. Using hosted billing pages
If you want to avoid building UI components entirely, you can use Mantle's Hosted Billing Pages:
import { useMantle } from "@heymantle/react";
import { useEffect } from 'react';

export default function () {
  const { createHostedSession } = useMantle();
  useEffect(() => {
    (async () => {
      const session = await createHostedSession({ type: 'plans' });
      open(session.url, "_self");
    })();
  }, []);
  return '';
}
This code redirects your customers to a fully managed plan selection page hosted by Mantle. After selecting a plan, customers will be redirected back to your app.
You can also display the customer's account page by changing the type parameter to 'account':
const session = await createHostedSession({ type: 'account' });If you want to hit the hosted sessions endpoint directly instead of using Mantle's React providers, you can use the Hosted Sessions API endpoint.
For more details about setting up and customizing hosted billing pages, see the Hosted Billing documentation.
Plan data structure
Whether you build your own UI or use Mantle's components, it helps to understand the plan data structure:
{
  "id": "plan-id",
  "name": "Pro Plan",
  "description": "For growing businesses",
  "amount": 29.99,
  "currencyCode": "USD",
  "interval": "EVERY_30_DAYS",
  "features": {
    "feature_key": {
      "id": "feature-id",
      "name": "Feature Name",
      "type": "boolean", // or "limit"
      "value": true,     // or a number for limits
      "displayOrder": 1
    },
    // more features...
  },
  "featuresOrder": ["feature_key", ...],
  // other plan properties...
}
You can use this structure to create custom plan displays tailored to your app's design.
For more information about creating and managing plans in Mantle, including setting up features, trials, and discounts, see the Plan Management documentation.
Handling plan subscription
After displaying plans to your customers, you'll need to handle the subscription process when they select a plan. Mantle provides a Subscriptions API that simplifies this process.
The basic flow involves:
- Sending a request with the selected plan ID and return URL
- Redirecting the customer to the Shopify confirmation page
- Having the customer redirected back to your app after confirmation
Mantle handles all the complexity of Shopify's billing API, including trial periods, discounts, and subscription management.
Here's what your plan selection UI might look like:
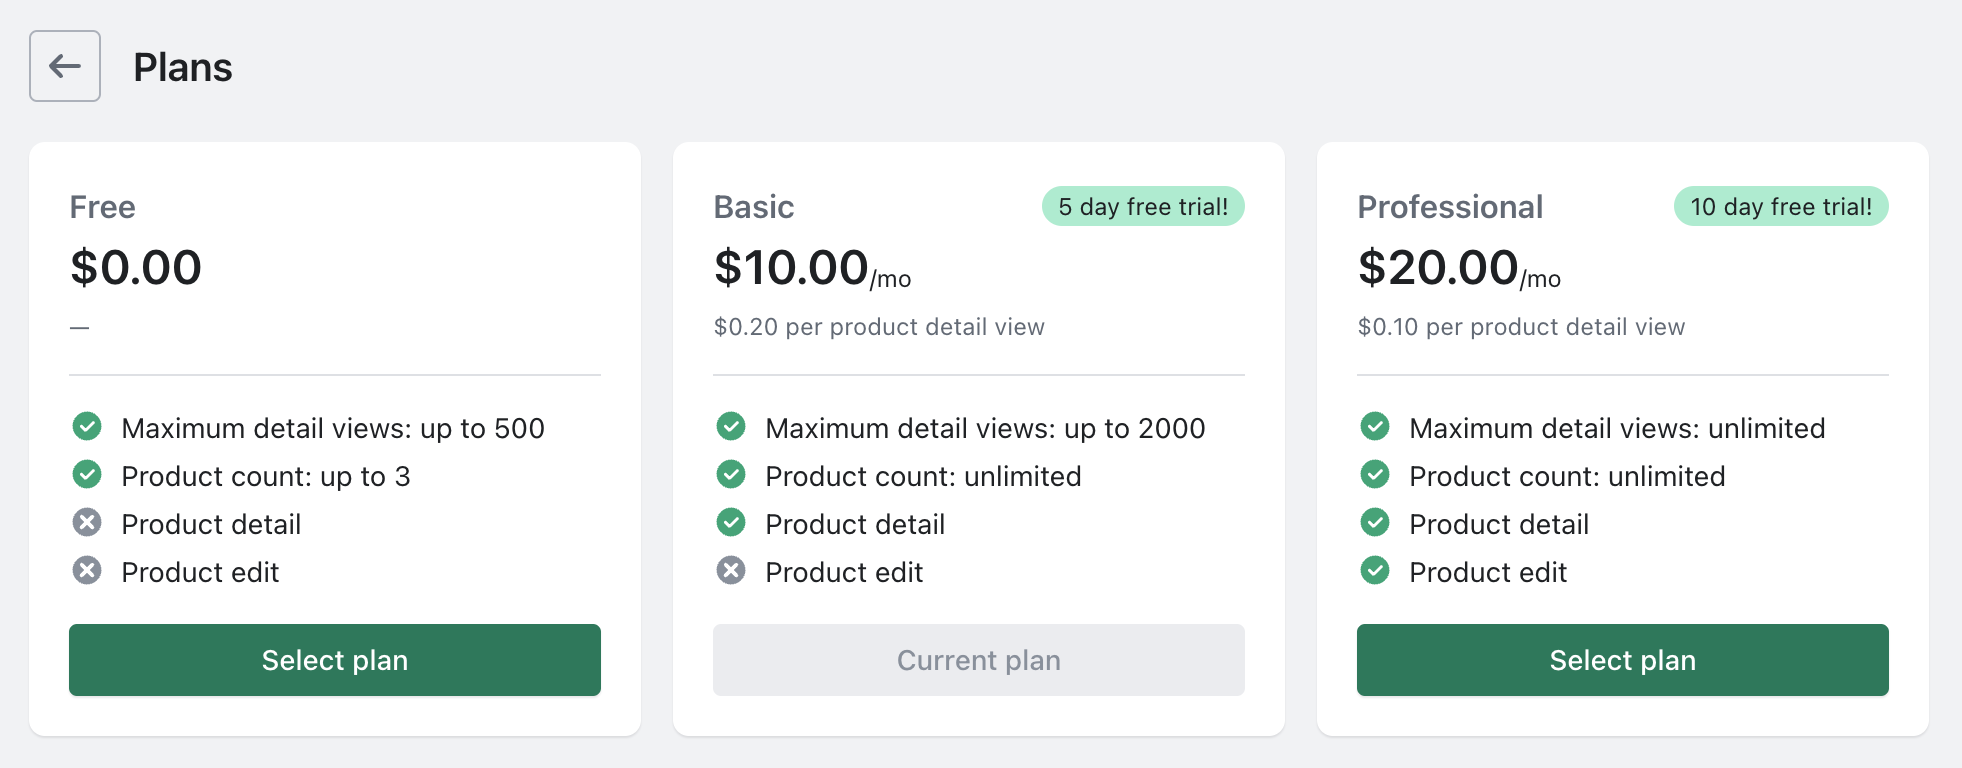
Example of plans being surfaced in an app
With these approaches, you can create a seamless plan selection experience that fits your app's needs, whether you want a quick implementation with pre-built components or complete customization with your own UI.
Updated over 1 year ago